How to compile and install gVirtualXRay Suite
Requirements
Make sure you have:
- CMake 3.12 or newer (see http://www.cmake.org/);
- A C++ compiler; and
- A GPU that supports OpenGL (integrated GPUs are fine).
For GNU/Linux
The examples below are for openSUSE Leap but you can adapt them for your own distro.
- You need cmake and a compiler:
$ sudo zypper in cmake-full gcc-c++- You need some system libraires:
    $ sudo zypper in libX11-devel \
                     libXi-devel \
                     libXcursor-devel \
                     libXinerama-devel \
                     libXrandr-devel \
                     libXxf86vm-devel \
glu-devel- For unit testing, SimpleGVXR and wrappers (optional):
$ sudo zypper in Mesa-libEGL1 Mesa-libEGL-devel libgbm1 libgbm-devel- For unit wrappers (optional):
    $ sudo zypper in swig \
        ruby-devel \
        tcl-devel \
        python3 python3-devel \
        java-11-openjdk \
        octave-devel \
        R-core R-base  R-core-devel R-base-devel
Mac OS X:
- Install XCode from the Mac App Store.
- Install the Command Line Tools package via the Terminal application using
$ xcode-select --install command.- Install CMake from https://cmake.org/download/
- For Wrappers, you may want to install SWIG and Python 3. I use homebrew for that purpose, see https://brew.sh/
Microsoft Windows
- Install Visual Studio from https://visualstudio.microsoft.com/vs/
- Make sure to select the C++ language
- Install CMake from https://cmake.org/download/
- You may want to install a git client, e.g. https://git-scm.com/download/win
- You may want to install a SVN client, e.g. TortoiseSVN from https://tortoisesvn.net/downloads.html
- For Wrappers, you may want to install Python 3 from https://www.python.org/downloads/ Make sure to install the development libraries.
Download the latest version of the source code
- The latest release (gVirtualXRay-1.1.3-Source.zip) available at https://sourceforge.net/projects/gvirtualxray/files/1.1/gVirtualXRay-1.1.3-Source.zip/download or
- The latest version from SVN at https://svn.code.sf.net/p/gvirtualxray/code/trunk
Installation from the source code
GNU/Linux and Mac OS X
Assuming the system is ready.
- Open a terminal and choose where the binaries should be installed. It must be a directory where you can write. If you can’t, make sure you use
sudo makerather thanmakein Steps 5 and 6. In the example below, I install it in my home directory ingvxr-install.
$ export GVXR_INSTALL_DIR=$HOME/gvirtualxray-install- go in the directory where you want to build the gVirtualXRay, e.g.
    $ mkdir ~/gvxr
$ cd ~/gvxr- Download the latest release:
    $ wget https://sourceforge.net/projects/gvirtualxray/files/1.1/gVirtualXRay-1.1.3-Source.zip/download
    $ mv download gVirtualXRay-1.1.3-Source.zip
$ unzip gVirtualXRay-1.1.3-Source.zip- Create a directory where the binaries will be created and go in this directory.
    $ mkdir gvxr-bin
$ cd gvxr-bin- Configure the project using CMake. Use
cmake,ccmakeorcmake-guidepending on you preferences.ccmakeandcmake-guiare interactive.cmake:
$ cmake \ -DCMAKE_BUILD_TYPE:STRING=Release \ -DCMAKE_INSTALL_PREFIX:STRING=$GVXR_INSTALL_DIR \ -DBUILD_TESTING:BOOL=ON \ -DBUILD_WRAPPER_CSHARP:BOOL=ON \ -DBUILD_WRAPPER_JAVA:BOOL=ON \ -DBUILD_WRAPPER_OCTAVE:BOOL=ON \ -DBUILD_WRAPPER_PERL:BOOL=ON \ -DBUILD_WRAPPER_PYTHON3:BOOL=ON \ -DBUILD_WRAPPER_R:BOOL=ON \ -DBUILD_WRAPPER_RUBY:BOOL=ON \ -DBUILD_WRAPPER_TCL:BOOL=ON \ -S .. \ -B $PWDccmake:
$ ccmake \ -DCMAKE_BUILD_TYPE:STRING=Release \ -DCMAKE_INSTALL_PREFIX:STRING=$GVXR_INSTALL_DIR \ -S .. \ -B $PWDcmake-gui:
$ ccmake \ -DCMAKE_BUILD_TYPE:STRING=Release \ -DCMAKE_INSTALL_PREFIX:STRING=$GVXR_INSTALL_DIR \ -S .. \ -B $PWD - Compile the project.
$ make -j16I used a parallel build with 16 jobs as I got 16 cores in my CPU. Adjust -j depending on your computer. Once the project is made, it is also installed. 7. Run the unit tests (optional)
$ make test- Install
$ make installor at your own risk as root using:
$ sudo make installIf you built the python wrapper, add its path to PYTHONPATH:
$ PYTHONPATH=$GVXR_INSTALL_DIR/gvxrWrapper-1.0.1/python3:$PYTHONPATHAnd to make it permanent:
    $ echo "" >> $HOME/.bashrc
    $ echo "################################################################################" >> $HOME/.bashrc
    $ echo "# Install gvxrPython3 in PYTHONPATH" >> $HOME/.bashrc
    $ echo export PYTHONPATH=$GVXR_INSTALL_DIR/gvxrWrapper-1.0.1/python3:\$PYTHONPATH >> $HOME/.bashrc
    $ echo "################################################################################" >> $HOME/.bashrc
Summary of all the commands:
export GVXR_INSTALL_DIR=$HOME/gvirtualxray-install

mkdir ~/gvxr
cd ~/gvxr

wget https://sourceforge.net/projects/gvirtualxray/files/1.1/gVirtualXRay-1.1.3-Source.zip/download
mv download gVirtualXRay-1.1.3-Source.zip
unzip gVirtualXRay-1.1.3-Source.zip

mkdir gvxr-bin
cd gvxr-bin

cmake \
    -DCMAKE_BUILD_TYPE:STRING=Release \
    -DCMAKE_INSTALL_PREFIX:STRING=$GVXR_INSTALL_DIR \
    -DBUILD_TESTING:BOOL=ON \
    -DBUILD_WRAPPER_CSHARP:BOOL=OFF \
    -DBUILD_WRAPPER_JAVA:BOOL=OFF \
    -DBUILD_WRAPPER_OCTAVE:BOOL=OFF \
    -DBUILD_WRAPPER_PERL:BOOL=OFF \
    -DBUILD_WRAPPER_PYTHON3:BOOL=ON \
    -DBUILD_WRAPPER_R:BOOL=OFF \
    -DBUILD_WRAPPER_RUBY:BOOL=OFF \
    -DBUILD_WRAPPER_TCL:BOOL=OFF \
    -S .. \
    -B $PWD

make -j16

make test

make install

export PYTHONPATH=$GVXR_INSTALL_DIR/gvxrWrapper-1.0.1/python3:PYTHONPATH

echo "" >> $HOME/.bashrc
echo "################################################################################" >> $HOME/.bashrc
echo "# Install gvxrPython3 in PYTHONPATH" >> $HOME/.bashrc
echo "PYTHONPATH=$GVXR_INSTALL_DIR/gvxrWrapper-1.0.1/python3:\$PYTHONPATH" >> $HOME/.bashrc
echo "################################################################################" >> $HOME/.bashrc
For Windows
I recommand to use 64 bits for all the components, including for Python 3.
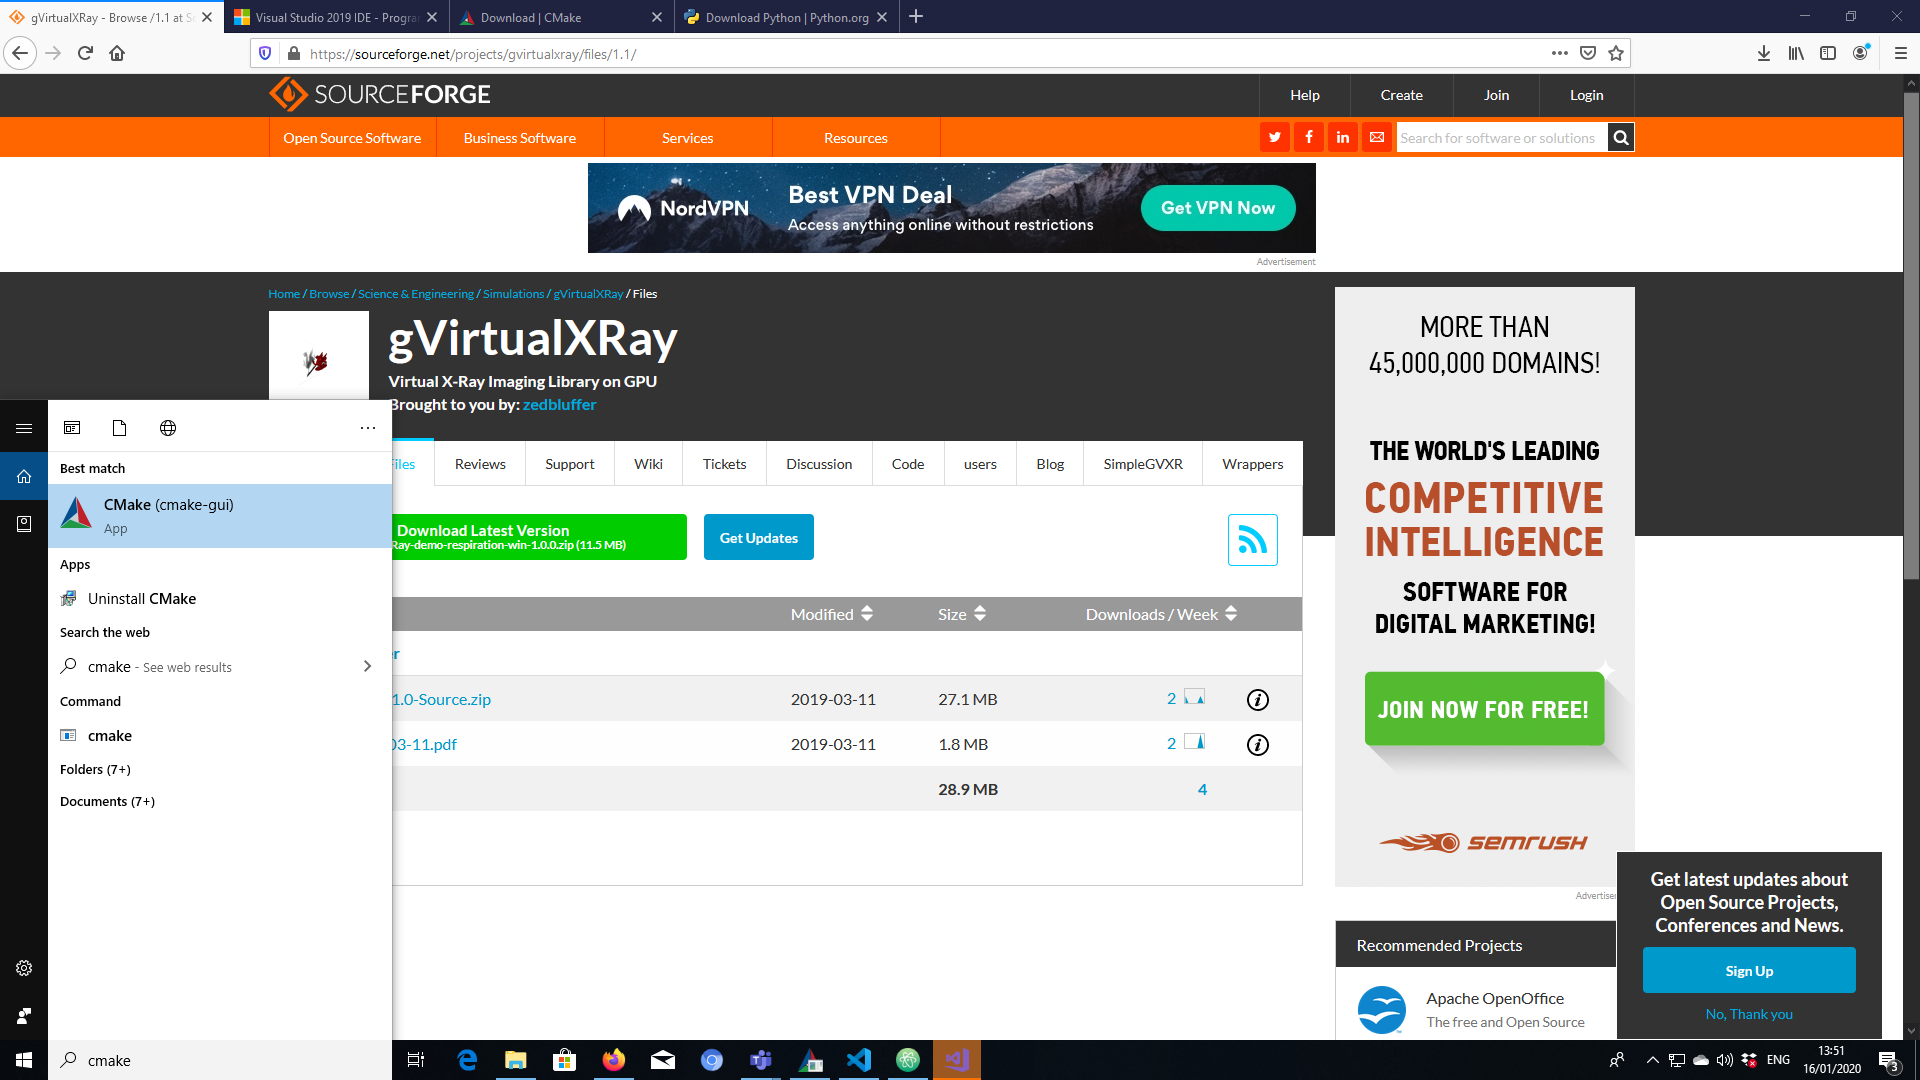
- Download and extract gVirtualXRay’s code from https://sourceforge.net/projects/gvirtualxray/files/1.1/gVirtualXRay-1.1.3-Source.zip/download.
- Open CMake’s gui.
Illustration
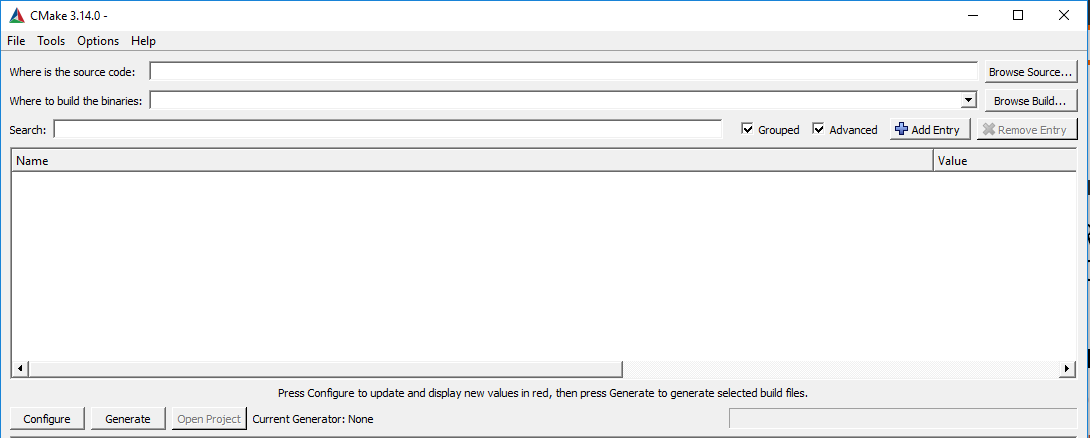
Illustration
- Select where the source code is. This is the top directory of the repository that contains CMakeLists.txt.
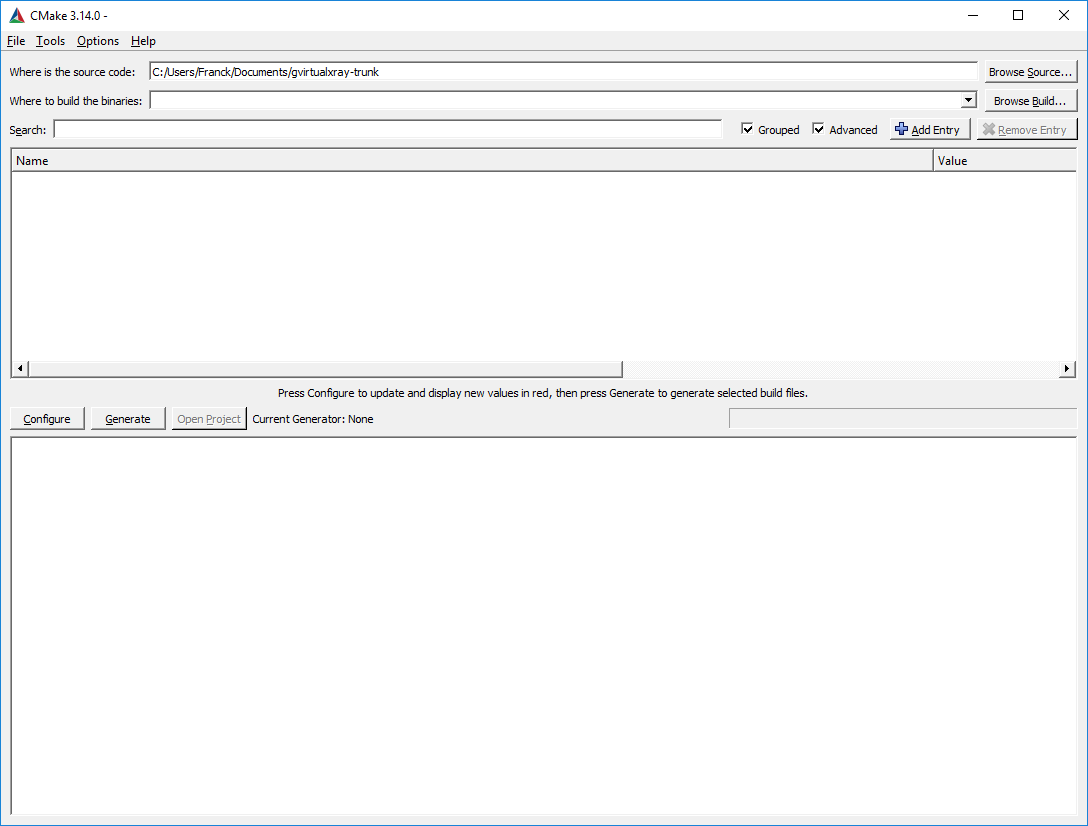
Illustration
- Select where the binaries are going to be compiled. It CANNOT be a sub-directory of the source directory chosen in the previous step.
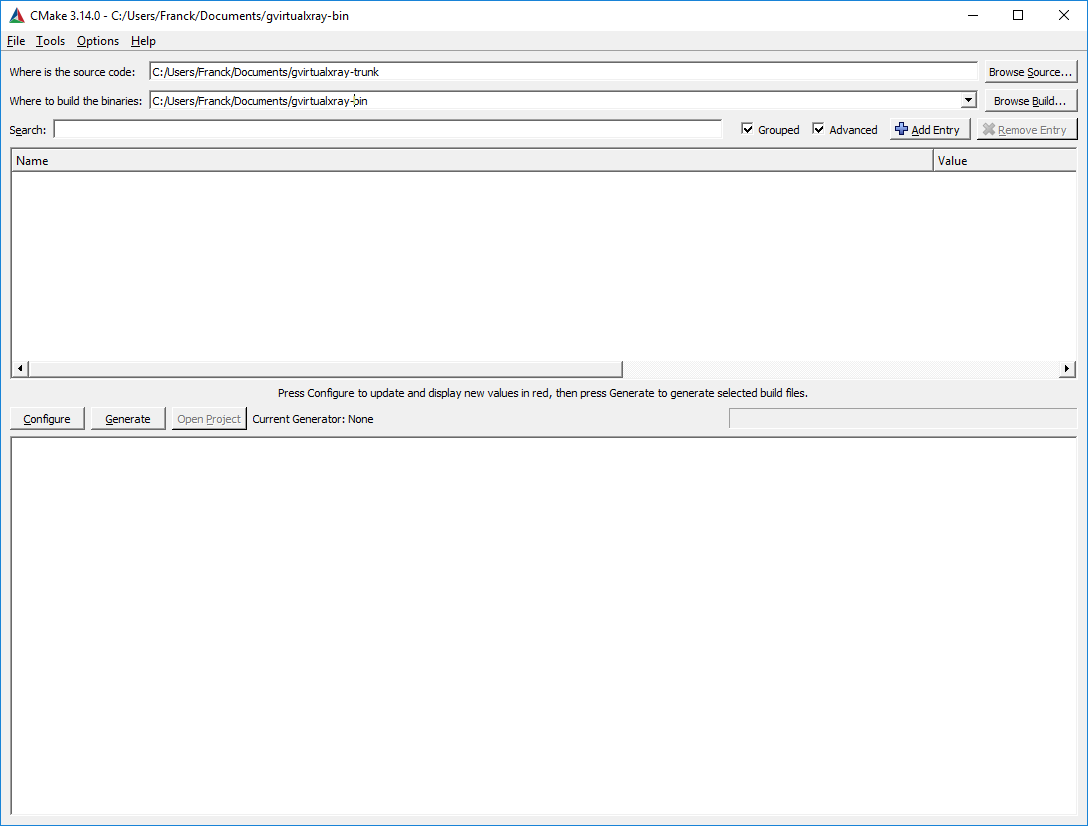
Illustration
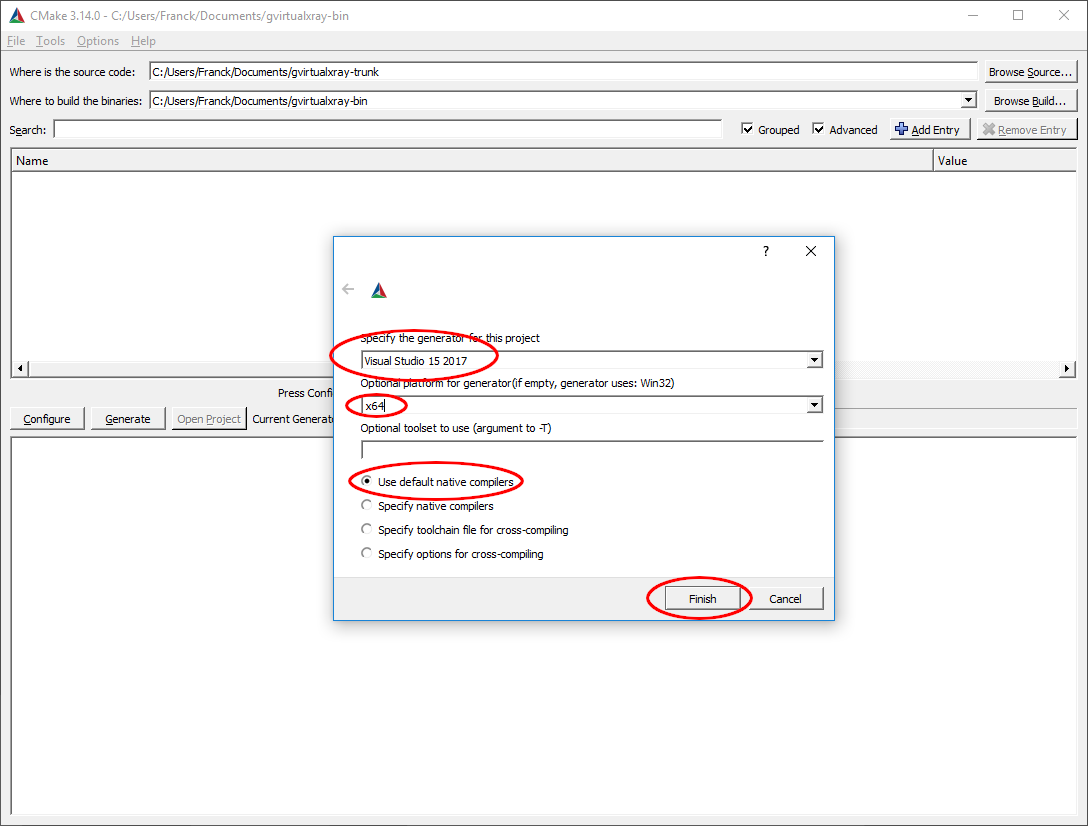
- Press configure, then choose which compiler you want to use and which architecture. I used Visual Studio 15 2017’s native compilers, and x64 (for 64 bits).
Illustration
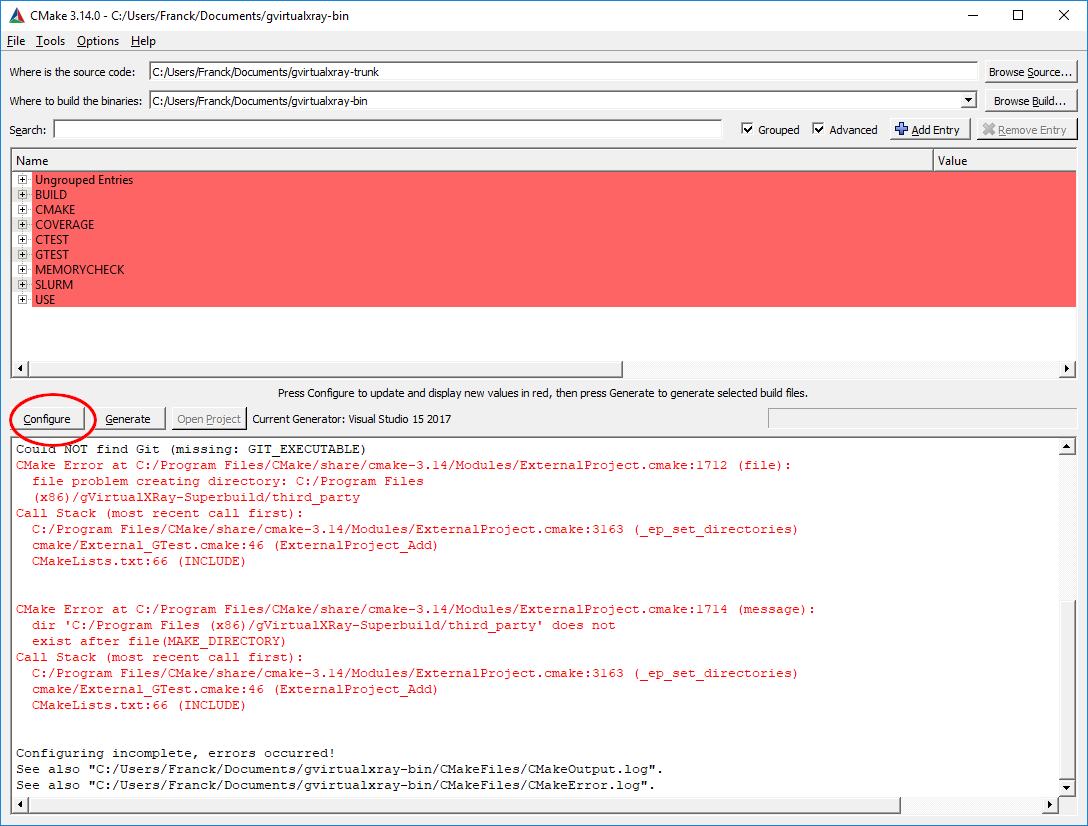
- Click on
Configure. There’ll be an error, but don’t worry about it.
Illustration
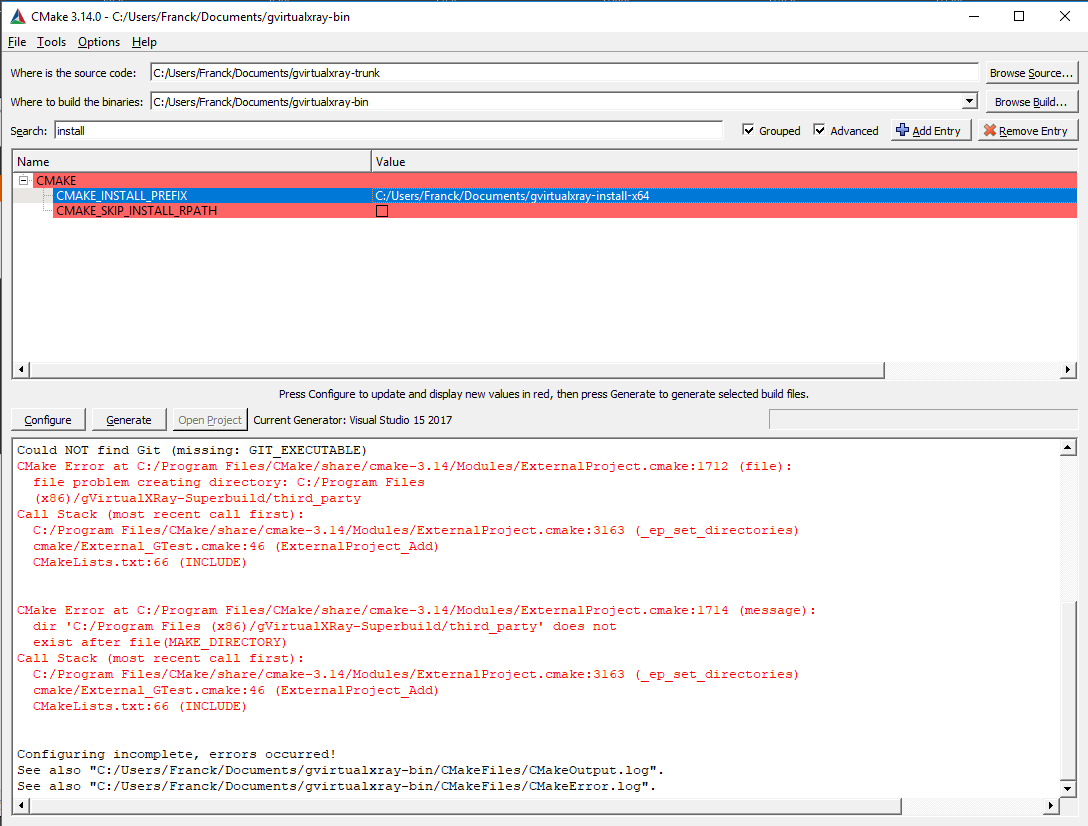
- Search for
install.

Illustration
- Change the variable
CMAKE_INSTALL_PREFIXinto a path where you are allowed to write. Click on configure. If it does not work, change the path and make sure you have write privilege for that path.
Illustration
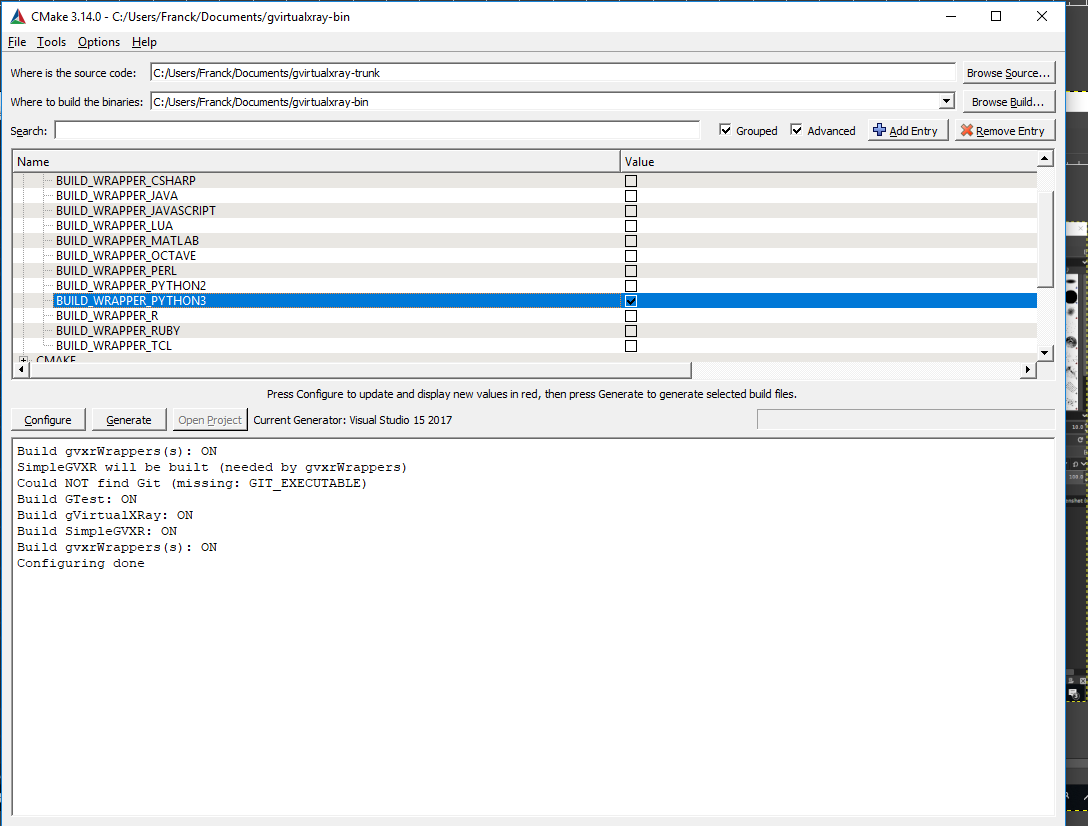
- If you want to build a wrapper, e.g. for Python 3, go to
BUILDand tick the right option(s) (in my caseBUILD_PYTHON£_WRAPPER). Now you can click onConfigure, thenGenerate, thenOpen Project.
Illustration
- It will open Visual Studio. Change Debug into Release.
Illustration
- Do a right click on
BUILD_ALLor press theF7key to build the project.
Illustration
- Go and make some coffee, it’s gonna take a bit of time… At the end, in the output, you should see something like
========== Build: 4 succeeded, ...Installation directory content in Windows
On Windows, you Should see 4 or 5 directories in the installation directory depending on wrappers:
- bin
- third_party
- include
- lib (Windows) or lib64 (GNU/Linux and Mac OS X???)
- gVirtualXRay-1.1.3
- Bin2C.cmake
- CreateHeaderFiles.cmake
- gVirtualXRayConfig.cmake
- include
- lib
- LICENSE.txt
- test
- third_party
- UsegVirtualXRay.cmake
- SimpleGVXR-1.0.1
- include
- lib
- SimpleGVXR-doc.i
- SimpleGVXRConfig.cmake
- test
- UseSimpleGVXR.cmake
- gvxrWrapper-1.0.1
- data
- python3
Installation directory content in GNU/Linux and Mac OS X
On Unixes, you Should see 3 or 4 directories in the installation directory depending on wrappers:
- third_party
- include
- lib (Windows and Mac OS X) or lib64 (GNU/Linux)
- gVirtualXRay-1.1.3
- Bin2C.cmake
- CreateHeaderFiles.cmake
- gVirtualXRayConfig.cmake
- include
- lib
- LICENSE.txt
- test
- third_party
- UsegVirtualXRay.cmake
- SimpleGVXR-1.0.1
- include
- lib
- SimpleGVXR-doc.i
- SimpleGVXRConfig.cmake
- test
- UseSimpleGVXR.cmake
- gvxrWrapper-1.0.1
- data
- python3
Test the Python wrapper
- Go to
gvxrWrapper-1.0.1/python3, - Execute the test script. You should see something like:
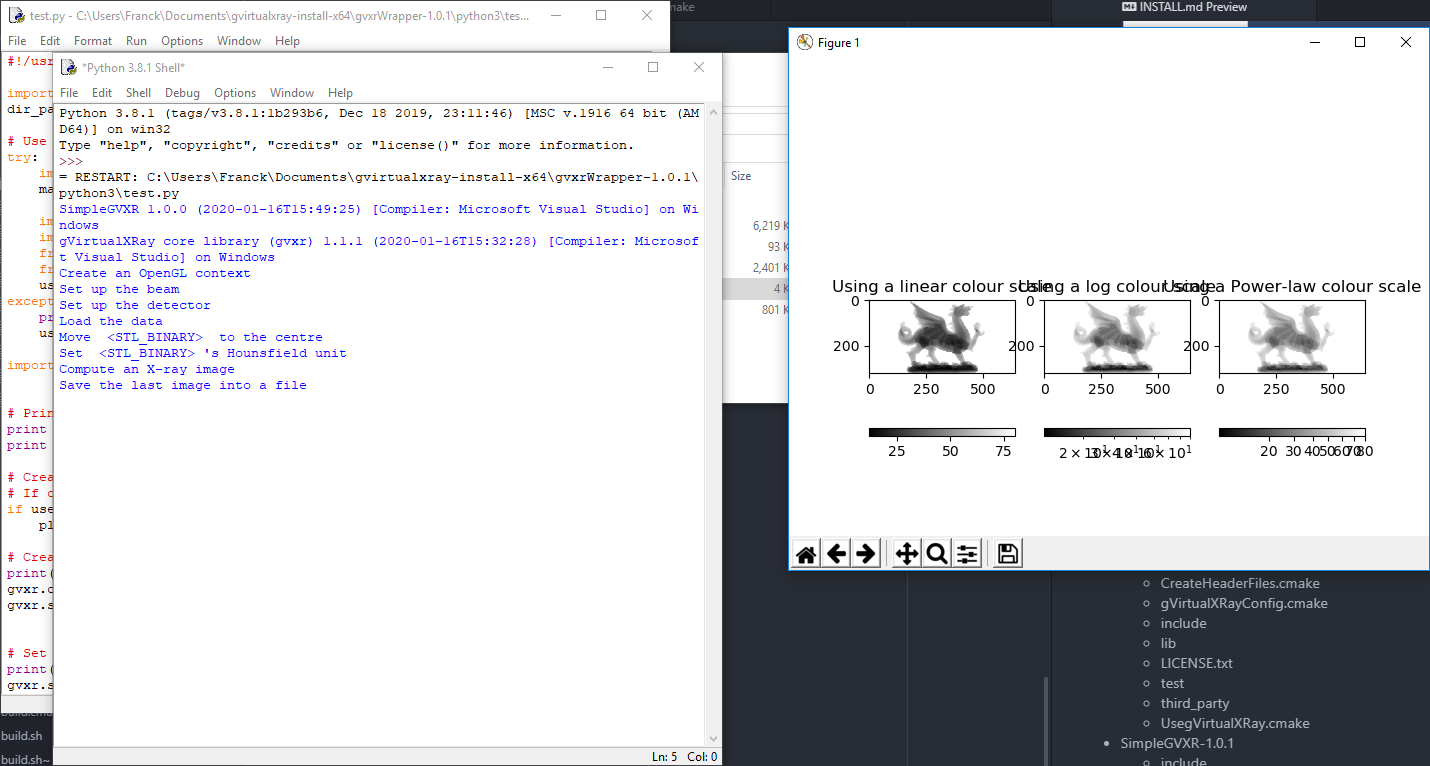 The X-ray image is displayed using linear, log and power law colour scales using Matplotlib.
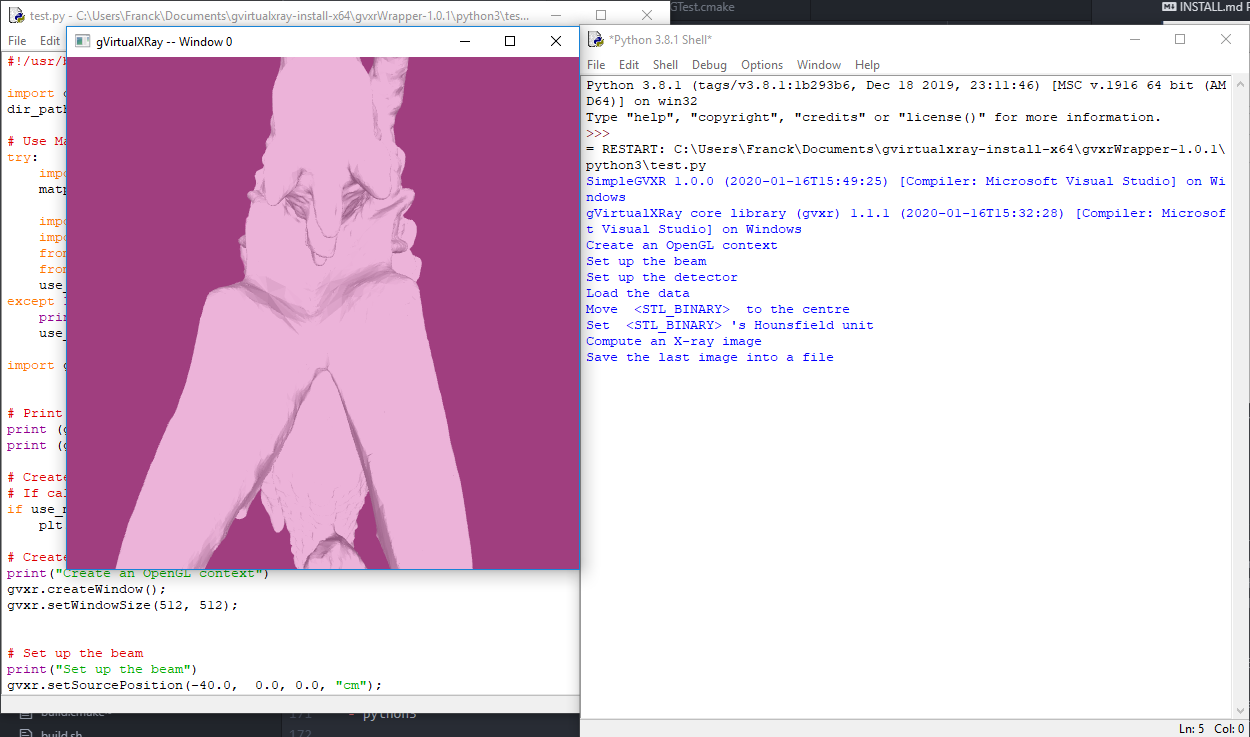
- Press
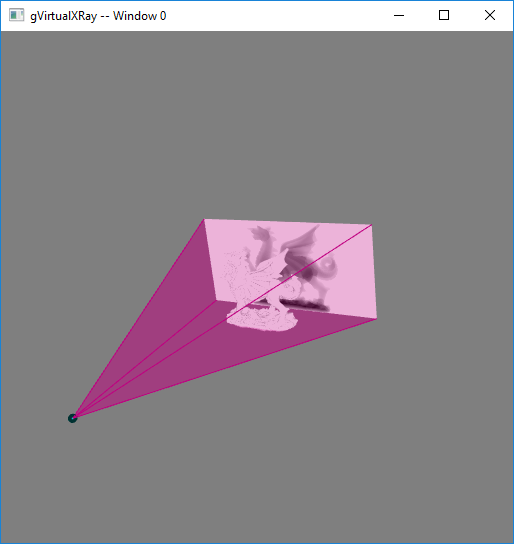
<Q>to close this window and the real-time viewer will open:
Illustration
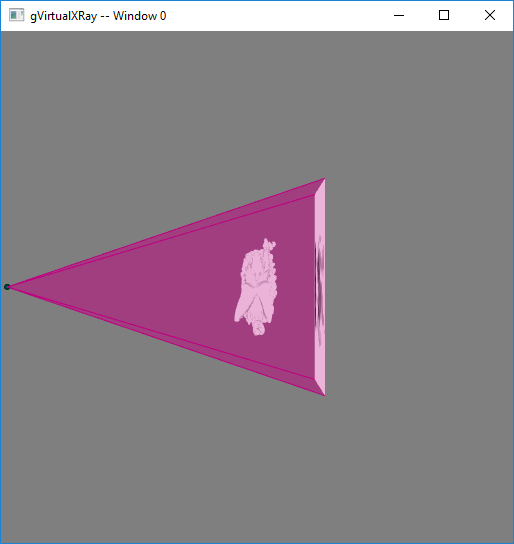
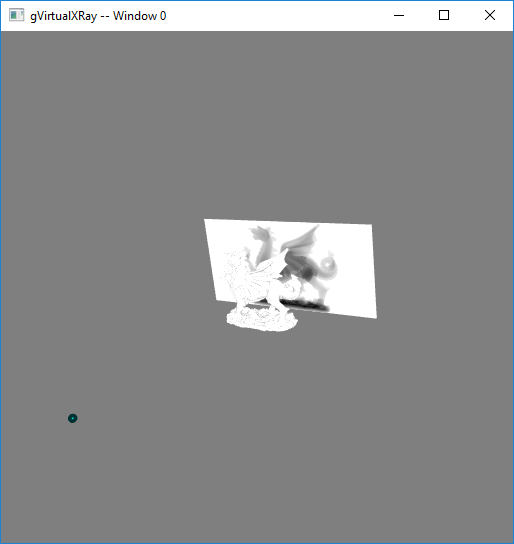
- Use the mouse wheel to zoom-out:
Illustration
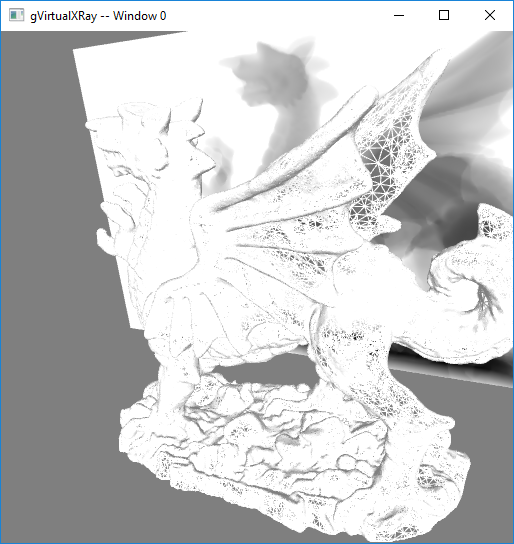
- Use the mouse left button and move the mouse around to adjust the view:
Illustration
- Press
<B>to hide/show the X-ray beam:
Illustration
- Press
<W>to view the 3-D object in solid/wireframe mode:

- You can also press
<N>to display the X-ray image in negative or positive and<H>to hide/show the X-ray detector. - Press
<Q>or<ESC>to exit. When the script ends, there’ll be two new files:
xray_image-0.mha: contains the X-ray image. MHA fies can be viewed with the popular scientific image viewer tool ImageJ/Fiji.lbuffer-0.mha: contains the length of X-rays crossed in the 3-D object.
- If you want to create your own simulations, have a look at the script. You can find it at https://sourceforge.net/p/gvirtualxray/code/HEAD/tree/trunk/Wrappers/python3/test.py.